At mamatoto.org you can find all you need to know about babywearing, including videos and tutorials on how to wrap your baby on your front, hip, or back. It also gives instructions on how to make a no-sew baby wrap. You can also purchase wraps from companies, but they are very pricey.
One wrap that I fell in love with was the Moby D wrap, but since they run $60-$70, it was out of the question. What I like about them is the middle section of the wrap (the part you pull up to support the baby's back) is made of a pretty, patterned fabric. The rest of the wrap is a solid color.
Now, I don't know a lot about sewing, but I know how to sew a straight line, so I was pretty sure that I could make this myself. So I splurged a little at the fabric store and bought about $50 worth of fabric. But I was able to make 4 wraps (2 different styles) and still have left over fabric.
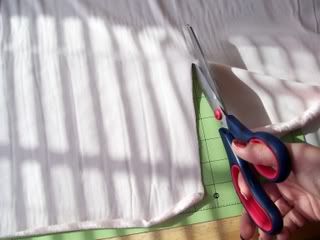
 You start with 5-6 yards of solid color fabric (I like to use 6, but a smaller woman would probably prefer 5). It should be 2-3 feet wide and since most of the fabric I purchase is usually about 6 feet wide, I generally just cut it in half. Your patterned fabric should be about 3 1/2 feet long and the same width of the wrap.
Find the very center of your wrap and pin the patterned fabric to it with the front of the patterned fabric facing the back of the solid fabric. (Note: If the fabric is solid it will most likely be the same on the front and back.) Use a sewing machine to sew along the top and the bottom (the long sides). Once these sides are sewn, pull the fabric inside out (like you would a sleeve). Thanks, Connie, for helping me figure that part out! Now the patterned fabric will be attached, hemmed, and showing right side out! You can hand sew the sides of the patterned fabric to the wrap or leave them loose.
.jpg)
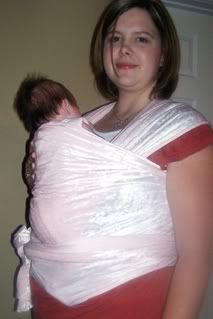
The solid pink in the above wrap is made of a crinkle fabric. I prefer the jersey knit to all of the other fabrics I have tried, but the crinkle makes a pretty wrap. What you can't see is that the solid fabric is wrapped and crossed around me and between Baby L's legs. She's very secure in there and loves to be worn! Once I put her legs into the crossed section, I pull the middle section (with the pattern) up behind her back. Here, the wrap is pulled all the way up to her head supporting her neck. If she falls asleep in the wrap, I can tuck her head into one side of the solid color fabric so that her head does not roll around while I am moving.

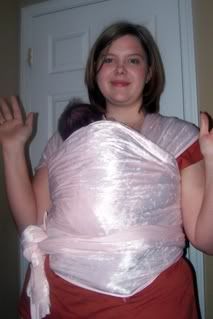
This wrap is made of fleece and now that the weather is turning cold, I'm using it quite a bit. In this picture, I haven't pulled the fabric all the way up Baby L's back. Now that she's bigger she likes to be able to move around a little more and see the world. Also, her legs are tucked inside the wrap. With a bigger baby, usually their legs will dangle out the bottom. She's in an in between stage and doesn't seem to mind it either way. Pin It Now!


